This is a story about bumbling into moderate success. The project objective, which I met, was to build a compass. Sounds simple, but the real objective to all of this is to learn--and I met that, too (as usual). In the sequence below, Steps 1-3 are basic setup, Step 4 is a straightforward programming implementation, The learning (for me) begins at Step5.
It all started a few months ago as explained in this post on Arduino and an OLED display. As mentioned in that post, I bought "Arduino for Ham Radio" by +Glen Popiel to see if I could spend time on two of my hobbies together. I'm neutral on the book, but I thought the compass project might be useful.
In attempt #1, partially pictured in the post mentioned above, I used an Uno clone and an OLED display and a magnetometer from eBay. I can't sweat to it now, but at the time I was sure that the magnetometer readings were off. Google revealed that some clones yield odd results. The board works fine for everything else I've tried, so I'm not sure, but in any case I have since committed to buy only genuine Arduino boards (for official boards like the Uno--I will buy variants by +Adafruit Industries like the Feather in this example).
Next step was to try another board. I got the Adafruit Feather M0 Basic Proto, Feather Wing OLED display, and HMC5883l Magnetometer (just in case the cheap one from eBay was faulty). With a breadboard and some jumper wires that's all I needed to build the prototype.
In this post, I will go through the learning and prototyping I did to build the compass.
- test the display
- add the magnetometer
- combine the examples
- add the text direction
- slow this down (this is where the fun starts)
- interrupt with and without sleeping
- battery status
- improving the display
- parts and code
- next steps
But first, here's a discussion of learning points and peculiarities (or at least things peculiar to me):
Resetting the Feather M0 for upload
Arduino and Arduino-ish boards have a variety of reset issues. For example, the Adafruit Trinket often requires that the user press upload in the IDE, wait a while, then press reset on the Trinket--otherwise the booloader is not active. On the Feather M0, it is often necessary to "double-click" the reset button to force it into booloader mode, where it stays until after upload.
This is a nice feature, but at least on my system (Windows 10, IDE 1.6.12) the Feather sometimes switches ports (COM3 before double-click reset, COM4 after, or vice versa, in my case).
Coding (stuff new to me)
The example in the "Arduino for Ham Radio" uses a variant of the magsensor example (from a different library) to display the heading in degrees and the corresponding text compass heading on an LCD display. The main modifications were to used the OLED instructions instead of LCD instructions and to use a function instead of a lengthy series of if constructs to determine the text heading (see Step 4).
To me, the most logical approach was to start with the magsensor example and add to that, reasoning that the compass is the objective and this code already has display code that I just needed to modify. Also, since the book example used a similar sketch as a base, I could just make the corresponding modifications as I went.
Resetting the Feather M0 for upload
Arduino and Arduino-ish boards have a variety of reset issues. For example, the Adafruit Trinket often requires that the user press upload in the IDE, wait a while, then press reset on the Trinket--otherwise the booloader is not active. On the Feather M0, it is often necessary to "double-click" the reset button to force it into booloader mode, where it stays until after upload.
This is a nice feature, but at least on my system (Windows 10, IDE 1.6.12) the Feather sometimes switches ports (COM3 before double-click reset, COM4 after, or vice versa, in my case).
Coding (stuff new to me)
I'm sure this is old news to some, but I learned some stuff in this exercise.
In researching how to enter sleep mode, I found this:
SCB->SCR |= 1<<2 div="">
SCB is System Control Block and SCR is System Control Register. -> is member assignment and << is left shift. I knew most of that (not ->), but the instruction looked strange to me. In English (my paraphrase--others may object), it says "OR the SCR with a 1 shifted 2 bits to the left, and assign the result to the SCR member of teh SCB structure." SCR bit 2 is the sleep bit. 0 is idle, 1 is deepsleep (see next item), so ORing it with a 1 makes the bit 1.
I thought that syntasx was a little obtuse, and with the help of the Adafruit Forum I found:
// SCB->SCR |= SCB_SCR_SLEEPDEEP_Msk;
which does the same thing, but (to me) makes more sense--it is closer to saying what you want to do instead of how you're twiddling the bits.
Now we can turn on the sleep bit--how to turn it off. For 40 years, I've been turning bits on with OR's and off with ANDs. Here, we are addressing the whole SCR but manipulating only one bit, so in either case, you need to leave everything else as is. You undo that by ORing with 0s and ANDing with 1s. I tried I few ways to code a binary in the operand, and thanks to the forum, this works (as in compiles--|= 0b000010 does work for deep sleep):
SCB->SCR &|= 0b11111011;
A better answer is to AND with the inverse of what we ORed with, so
SCB->SCR &= ~SCB_SCR_SLEEPDEEP_Msk;
turns the bit off.
Another feature, described in Step 6 below is digitalPinToInterrupt(). I was reading old materials on interrupts, evidently before this feature was added. In the olden days (like 3 years ago), the attachInterrupt instruction required (interrupt#, ISR, mode)--more on operand 2 and 3 later. Interrupt number is hardware dependent and different from pin number in many cases. To make it more readable and more portable, replace interrupt# with digitalPinToInterrupt(pin#). The function returns the interrupt number for that pin on the device being used. This is really important as more and more boards join the Arduino family.
Sleep mode
As I write this I am in a discussion on the Adafruit forum to determine how to get the Feather M0 into idle mode, showing how the Adafruit community helped me solvd the problem of getting to idle mode,
For deep sleep, I coded the instruction above in setup, and put a wait-for-interrupt (__wfi();) at the top of the loop. That works. The button press causes an interrupt, the loop does it's thing then waits again on iterating back to the top (see Step 6 below). I could not get it to work for idle mode.
Looking through datasheets, programming guides, examples, searches and the above-referenced forum thread, the best answer is to code SCB->SCR &= ~SCB_SCR_SLEEPDEEP_Msk; in setup. However, according to what I read, this is not enough, There are 3 idle modes, controlled by 2 bits in Power Management. The masks for each value are defined (on my Windows system) in ~\AppData\Local\Arduino15\packages\tools\CMSIS\4.0.0-Atmel\Device\ATMEL\samd21\include\component\pm.h
So, PM->SLEEP.reg |= PM_SLEEP_IDLE_APB; sets the bits to 2 (b'10')
Even with the correct syntax, I struggled with this. It appeared that it was not waiting. As it turns out, in idle mode, other things could still wake it up, so I added an explicit test of the booleans set in the ISRs. If neither was set, I wait until one is. Very simple solution. Thanks Adafruit forum!
ISR modes and sleeping
As noted below, FALLING works for a pin going from HIGH to LOW if you're not sleeping. However, FALLING and RISING use clock, which is turned off. So the attach should be coded:
attachInterrupt(digitalPinToInterrupt(BUTTON_B), headingISR, LOW);
Those are the high points. What follows is how I went about building it.
Step 1 - test the display
This step was really just a matter of soldering stacking headers on the Feather M0, female headers on the Feather Wing, and following the Adafruit SSD1306 tutorial.
- solder the headers on the boards
- mount the M0 on the breadboard
- mount the Feather Wing on the M0
- install the Adafruit_SSD1306 and Adafruit_GFX libraries (see SSD1306 tutorial)
- preparing the IDE for the M0 (see the M0 tutorial)
- run the SSD1306 example program ssd1306_128x32_i2c (see SSD1306 tutorial)--the Feather Wing is 128X32 and uses I2C
Step 2 - add the magnetometer
Note that the example uses serial, not the OLED display, so you could do this part with or without the Feather Wing.
- solder the header pins (if it's new like mine was)
- add to the breadboard
- it's I2C, so connect SDA to pin A4 on the M0, SCL to A5
- connect VIN to the 3V rail and GND to the ground rail
- follow the Adafruit HMC5883l tutorial to install the Adafruit_Sensor and Adafruit_HMC5883_U libraries
- run the Adafruit_HMC5883_U example sketch magsensor
Step 3 - combine the examples
I was now working with 3 examples that I needed to combine: SSD1306, HMC5833_U, and the book.The example in the "Arduino for Ham Radio" uses a variant of the magsensor example (from a different library) to display the heading in degrees and the corresponding text compass heading on an LCD display. The main modifications were to used the OLED instructions instead of LCD instructions and to use a function instead of a lengthy series of if constructs to determine the text heading (see Step 4).
To me, the most logical approach was to start with the magsensor example and add to that, reasoning that the compass is the objective and this code already has display code that I just needed to modify. Also, since the book example used a similar sketch as a base, I could just make the corresponding modifications as I went.
- save the magsensor example to your sketchbook directory/folder and give it a meaningful name like "magsensor_OLED"
- add the OLED libraries (see step 1 above)
- add ssd1306 display code (I find the easiest way to do this is to leave the Serial instructions in place to use for testing and clone them as displays). Note that you will need to add clearDisplay, setCursor, and the all-important display.display() in addition to changing serial.print to display.print (etc.). So, this line:
Serial.print("Heading Degrees: ");Serial.println(headingDegrees);
will be copied and cloned as:
Serial.print("Heading Degrees: ");Serial.println(headingDegrees);
display.clearDisplay();
display.setCursor(0,0);
display.print("Heading Degrees: "); display.println(headingDegrees);
display.display():
So, we still use the serial monitor, but that scrolls continually. For the OLED, we need to clear whatever was there (ClearDisplay). position the cursor at the home position (setCursor--operands are column, row-relative to zero), move the text to the buffer (print, println--work just like Serial). and display the buffer contents (display). Trust me, if you you skip the display.display(), you will not see what you expect.
Step 4 - add the text direction
The Ham Radio book uses what I consider to be an ugly series of if statements to determine which of the 16 compass points (N, NNE, NE, ENE, E and so on) corresponds to the heading in degrees. I replaced this with a 16 element string array, and a function to find the appropriate element.
String directionArray[] = {"N","NNE","NE","ENE","E","ESE", "SE","SSE","S","SSW","SW","WSW","W","WNW","NW","NNW" }; //array for map function 16 compass directions
The function (see the comment about how N is handled, also note that map only works on decimals, so I multiplied by 100 and worked in steps of 2250):
String mapDirection (float headDeg)
{
/*function to return direction in text based on heading in degrees. N is 11.25 degrees each side of 0, so that doesn't work too well with the map function. So if it's N, we say so. This is a nice way of taking the procedural stuff out of line, so the loop code can just ask for the direction
*/
if (headDeg > 348.75 | headDeg < 11.26)<11 .26="" 0="" around="" case="" degrees="" direction="North," div="" nbsp="" special="" wrapped="">
{
Dir = 0;
} else {
//not North, so we eliminate the decimals and map degrees to text in 22.5 degree increments
Dir = map(headDeg*100, 1126, 34875,1,15); //map only works on whole #s so we eliminate 2 decimal places
}
//and return the selected text compass direction
return directionArray[Dir];
}
So, we can use the function directly in the display statement from the last step, which now reads:
display.print("Heading Degrees: "); display.print(headingDegrees); display.print(" ");
display.println(mapDirection(headingDegrees));
Step 5 - slow this down (this is where the fun starts)
Sitting at a desktop computer, it's fun to watch the heading info scroll by on the serial monitor or flash by on the OLED. However, that'not great for a walk in the woods. First of all, you probably won't have the project tied to a USB port, it would be powered by a battery. Further, continuous updates would use more battery than you want.
Option 1: delay
The first option, the one used in the Ham Radio book, is to code a delay, maybe for a second, to slow things down and reduce the number of times the Feather has to read the sensor. In this case, just code
delay(1000);
after displaying the heading.
Option 2: button
Option 1 still probably yields more measurements than you need, wasting power. Another possibility would be to only display the heading when the operator asks for it. The Feather Wing has 3 buttons, labeled A, B, and C. So, in setup we could display "press button B" on the OLED, and in the loop test to see if button B was pressed. (I'll explain later why I don't use button A).
The buttons have pull-up resistors, so pressing them causes the pin to go LOW. On the zero, the buttons are assigned to pins as follows:
#define BUTTON_A 9
#define BUTTON_B 6
#define BUTTON_C 5
Then, in loop, test the button state:
if (!digitalRead(BUTTON_B)) //means BUTTON_B is LOW, so it's pressed
{
[get the sensor data, display on OLED as above]
}
delay(3000) //wait 3 seconds
clear display
display "press button" message
This is all fine and good, but what we want is for the device to sleep unless we want to use it, not to be continually checking to see if the button was pressed, That requires some additional programming.
Step 6: interrupt with and without sleeping
I recently bought "Programming Arduino: Getting Started with Sketches" by +Simon Monk. It reintroduced me concepts I first met in Jeremy Blum's (+sciguy14) arduino tutorials (tutorial #10 was on interrupts). I also did a C Course on Udemy that included interrupts on a TI device..
So, I thought this would be a good application.
Interrupt without sleep
First, I figured I'd replace testing for a button press with code to see if we'd been interrupted. This should have been straightforward. In setup, code an attachInterrupt of the type:
attachInterrupt(interrupt#, ISR, mode); where
interrupt# = number of the interrupt (hardware dependent, NOT the same as pin number)
ISR = interrupt service routine--code that is executed on the interrupt, returning to the interrupt point
mode = HIGH, LOW, RISING, FALLING, CHANGE depending on how you want the interrupt triggered--when the pin goes HIGH, LOW, LOW to HIGH, HIGH to LOW, or changes, respectively.
This drove me a little nuts. I went through the Adafruit documentation for the device, and found the pinout diagram. Following what Simon and Jeremy said, I coded the statement for interrupt number 4 (button b is connected to pin 6, and in the pinout.it says EXTINT4 for that pin). It didn't work. I looked through the interwebs until I stumbled upon the statement definition on arduino.cc (when all else fails...). There I learned 2 things. First, on the zero, the pin number = interrupt number (I don't know what EXTINT4 in the pinout means). Second, for portability, you can use digitalPinToInterrupt(pin#), so if you change to a board that uses a different interrupt number for the same pin you don't have to change your code. Of course, if the second board does not allow interrupts on that pin, you still need to change it. So, I was able to code:
attachInterrupt(digitalPinToInterrupt(BUTTON_B), headingISR, FALLING);
meaning that when the pin BUTTON_B goes from HIGH to LOW, invoke headingISR
All headingISR does is set a boolean. The loop code can then check to see if the boolean is set and if so, reset it and go on to display the compass reading. Here are the relevant parts:
volatile boolean headingRead = false;
void headingISR() //ISR for button B press
{
headingRead = true;
}
in loop:
if (headingRead) {
headingRead = false;
headingRead = false;
[code to read compass and display heading]
} else {
[delay/clear/display press button message, as above]
}
Interrupt with sleep
This works nicely, but the device is still active all the time. The next step was to figure out how to put the M0 into low-power mode (sleep) while it's waiting for the operator to ask for a button to be pushed. The solution took some investigation to find, but it turns out to be very simple to implement.
What we want to do is to tell the M0 to wait for an interrupt, and to sleep while it's doing that. Fortunately there is a wait-for interrupt instruction:
__wfi();
That's a double underscore, I did not notice that at first and chased a lot of documentation before I figured it out.
If you just use that instruction, it has no effect. It must be preceded by setting a bit in the System Control Register (SCR). Bit 2 is the sleep bit. 0 means sleep, 1 means deep sleep. Not all processors support two sleep modes. As best I can determine, the Feather M0 supports only deep sleep, because leaving the bit at 0, or setting it to zero, has no effect--just like coding the wfi with no preceding operations. As I write, I have a query on the Adafruit forum to verify this (see discussion under "Sleep Mode" above).
The sequence is:
SCB->SCR |= SCB_SCR_SLEEPDEEP_Msk; /set sleep bit to 1--do this in setup
then, in loop, code:
__wfi():
I found the above in this post on the arduino.cc forum. I also found the bit-twiddling written this way:
SCR->SCR |= 1<<2 1="" 2="" a="" bit="" bits="" div="" left="" nbsp="" or="" scr="" shifted="" the="" to="" with="">
and I figured out that it also works if coded SCR->SCR |= 0b00000100. I think the shifting is the least readable (as in self-documenting), the bits are a little better, and the mask (first example) is the best. I'm sure others disagree.
To implement, leave the attachInterrupt and ISR as above, add the bit setting in setup, and delete the if/else construct for headingRead, replacing it with:
__wfi();
[code to read compass and display heading]
[delay/clear/display press button message, as above]
The display now reads "press button B" until button B is pressed. On the interrupt, it gets the reading and displays it for the time of the delay (I used 3 seconds), then displays the button message again and goes to sleep.
To have the button message display initially, that code must also be included in setup.
Reminder: the FALLING mode on the attachInterrupt does not work in sleep mode since it involves the timer, so I changed the mode to LOW (since pressing the button sets the pin to LOW).
Step 7 - Battery status
Since the probable use of these device is in the field, on battery, it would be nice to track battery status. The Feather M0 has this ability to read battery voltage. See the Feather M0 Basic Proto tutorial.
A fully charged 3.7V LiPo battery will read ~4.2V. When it drops below 3,7V, it should be recharged (nice that the Feather has a built-in charger).
The code in the tutorial works as-is. Note that VBATPIN is A7. A7 is also D9, and D9 is connected to BUTTON_A. That's why I don't use BUTTON_A for interrupts. The code sort of works, but it's flaky.
In keeping with learning interrupts, I added on on BUTTON_C. When the operator presses BUTTON_C, the battery status is displayed for 3 seconds and then the heading is displayed.
To implement, we add VBATPIN:
#define VBATPIN A7
add a new attachInterrupt:
attachInterrupt(digitalPinToInterrupt(BUTTON_C), batteryISR, LOW);
add the ISR:
void batteryISR() //ISR for button A press
{
batteryRead = true;
}
and in loop, after the wfi, code:
if(batteryRead) //we woke up because Button C was pressed
{ batteryRead = false; //reset the battery flag
[code to display battery status from tutorial]
delay(3000); //hold for 3 seconds
}
[rest of current loop: display compass heading ]
Step 8 - improving the display
The 128x32 dimensions of trhe display is in pixels. The library generates characters of 5x8 pixels, meaning we get 128/8 = ~ 25 columns X 32/8 = 4 rows of characters, using the setTextSize(1), where 1 is a whole number to scale the dimensions.The display is pretty small, and we don't have a lot of text, so we can make some characters larger. For example, to enlarge just the "B" in the press button b message, we code:
// Clear the buffer and display the press button message
display.clearDisplay();
display.setCursor(0,0);
display.print("Press Button ");display.setTextSize(2); display.print("B");
display.display();
display.setTextSize(1); //reset size for next time
The "press button " is standard, but the B is double size (10x16 pixels)--we can only get 2 rows of about 12 characters at that size.
For further readability, I also made the entire battery status and heading messages double size. Another option that I did not choose would have been to setTextColor(INVERSE)--I used WHITE.
Step 9 - parts and code
Parts List
Adafruit Feather M0 Basic Proto with stacking headers
Adafruit Feather Wing OLED display with female headers
Adafruit HMC5883l Magnetometer with standard male headers
Breadboard and jumper wires
Code
/********************************
2016-1011 VM
Code sample from Adafruit web site, FeatherWing OLED example
Combined with HMC5883L example as described below
Added power management, interrupts, and battery status display, plus a function
******************/
/***************************************************************************
This is a library example for the HMC5883 magnentometer/compass
Designed specifically to work with the Adafruit HMC5883 Breakout
http://www.adafruit.com/products/1746
*** You will also need to install the Adafruit_Sensor library! ***
These displays use I2C to communicate, 2 pins are required to interface.
Adafruit invests time and resources providing this open source code,
please support Adafruit andopen-source hardware by purchasing products
from Adafruit!
Written by Kevin Townsend for Adafruit Industries with some heading example from
Love Electronics (loveelectronics.co.uk)
This program is free software: you can redistribute it and/or modify
it under the terms of the version 3 GNU General Public License as
published by the Free Software Foundation.
This program is distributed in the hope that it will be useful,
but WITHOUT ANY WARRANTY; without even the implied warranty of
MERCHANTABILITY or FITNESS FOR A PARTICULAR PURPOSE. See the
GNU General Public License for more details.
You should have received a copy of the GNU General Public License
along with this program. If not, see.
***************************************************************************/
#include
#include
#include
#include
#include
Adafruit_SSD1306 display = Adafruit_SSD1306();
#if defined(ESP8266)
#define BUTTON_A 0
#define BUTTON_B 16
#define BUTTON_C 2
#define LED 0
#elif defined(ARDUINO_STM32F2_FEATHER)
#define BUTTON_A PA15
#define BUTTON_B PC7
#define BUTTON_C PC5
#define LED PB5
#elif defined(TEENSYDUINO)
#define BUTTON_A 4
#define BUTTON_B 3
#define BUTTON_C 8
#define LED 13
#else
//these are the values for the Feather M0
#define BUTTON_A 9
#define BUTTON_B 6
#define BUTTON_C 5
#define LED 13
#endif
#define VBATPIN A7 //aka D9, which BUTTON_A uses on the M0--don't use BUTTON_A for interrupts if you are also trying to display battery status
#if (SSD1306_LCDHEIGHT != 32)
#error("Height incorrect, please fix Adafruit_SSD1306.h!");
#endif
/* Assign a unique ID to this sensor at the same time */
Adafruit_HMC5883_Unified mag = Adafruit_HMC5883_Unified(12345);
String directionArray[] = {"N","NNE","NE","ENE","E","ESE", "SE","SSE","S","SSW","SW","WSW","W","WNW","NW","NNW" }; //array for map function 16 compass directions
int Dir=0; //index for directionArray
const float declinationAngle = 0.261799; //angle for Orleans, MA
float heading = 0; //this and next for comparison to see if we've been interrupted
volatile boolean headingRead = false; //variables in ISR need to be volatile
volatile boolean batteryRead = false;
#if defined(ARDUINO_SAMD_ZERO) && defined(SERIAL_PORT_USBVIRTUAL)
// Required for Serial on Zero based boards
#define Serial SERIAL_PORT_USBVIRTUAL
#endif
void headingISR() //ISR for button B press
{
headingRead = true;
}
void batteryISR() //ISR for button A press
{
batteryRead = true;
}
String mapDirection (float headDeg)
{
//function to return direction in text based on heading in degrees
//N is 11.25 degrees each side of 0, so that doesn't work too well with the map function
//so if it's N, we say so
//this is a nice way of taking the procedural stuff out of line, so the loop code can just ask for the direction
if (headDeg > 348.75 | headDeg <11 .26="" 0="" around="" case="" direction="North," nbsp="" p="" special="" wrapped=""> {
Dir = 0;
} else {
//otherwise we elimiate the decimals and map degrees to text in 22.5 degree increments
Dir = map(headDeg*100,1126,34875,1,15);
}
//and return the selected text compass direction
return directionArray[Dir];
}
void setup() {
// by default, we'll generate the high voltage from the 3.3v line internally! (neat!)
display.begin(SSD1306_SWITCHCAPVCC, 0x3C); // initialize with the I2C addr 0x3C (for the 128x32)
// init done
// Show image buffer on the display hardware.
// Since the buffer is intialized with an Adafruit splashscreen
// internally, this will display the splashscreen.
display.display();
delay(1000);
pinMode(BUTTON_A, INPUT_PULLUP);
pinMode(BUTTON_B, INPUT_PULLUP);
pinMode(BUTTON_C, INPUT_PULLUP);
// Clear the buffer and display the press button message
display.clearDisplay();
display.setCursor(0,0);
display.print("Press Button ");display.setTextSize(2); display.print("B");
display.display();
display.setTextSize(1); //reset size
/* Initialise the sensor */
if(!mag.begin())
{
/* There was a problem detecting the HMC5883 ... check your connections */
display.println("Ooops, no HMC5883 detected ... Check your wiring!"); display.display();
while(1);
}
interrupts(); //enable interrupts (should not need to do this, but just for drill...)
//on the zero (as in Feather M0), interrup#=pin#; we use digitalPintToInterrupt here to provide some portability
//if we change to a different board AND that board allows interrups on the same pins, we don't have to change anything to get the interrupt number
//if we're using the battery function, VBATPIN is A7, also D9, and button A uses D9, so we avoid conflict
attachInterrupt(digitalPinToInterrupt(BUTTON_B), headingISR, LOW); // when button B is pressed display compass heading; use LOW because FALLING does not work in sleep mode--needs a timer
attachInterrupt(digitalPinToInterrupt(BUTTON_C), batteryISR, LOW); // when button C is pressed display battery status
//set System Control Register (SCR) sleep bit to deep sleep (do once so wfi (wait for intyerrupt) in loop waits)
//There are 2 sleep modes, idle and standby (deep) Sleep bit is SCR bit 2, 0 is idle, 1 is standby
// SCB->SCR |= 0b00000100; //just a test to see how to code binary--this works
// SCB->SCR |= SCB_SCR_SLEEPDEEP_Msk; // set to deep sleep (bit-1) by ORing with 100
SCB->SCR &= ~SCB_SCR_SLEEPDEEP_Msk; //set to idle (bit=0) by ANDing with the inverse of above--leaves all bita alone except sleep, which ANDs to 0
// SCB->SCR &= 0b11111011; //another test
//There are 3 idle modes, 0 (CPU),1 (CPU,AHB clock),2 (CPU,AHB,APB). Set this if using IDLE
PM->SLEEP.reg |= PM_SLEEP_IDLE_APB; //idle turn off CPU, AFB, APB //Advanced Peripheral Bus (APB) Advanced High-performance Bus (AHB)
// display instructions at startup
//set size and color of text, tell the user we're waiting 10s, then say to press the button
display.setTextSize(1); //parameter is scale of 5X8 pixels
display.setTextColor(WHITE); //options are BLACK | WHITE | INVERSE
display.clearDisplay();
display.setCursor(0,0);
display.println("initializing for 10s");
display.display();
// delay(10000); //see if sensor will settle down before taking reading
display.setCursor(0,0);
display.clearDisplay();
display.print("Press Button ");display.setTextSize(2); display.print("B"); //button letter is double size
display.display();
display.setTextSize(1); //reset size
}
void loop() {
//the wfi() means we only progress in loop on an interrupt, either button B or C pressed invoking headingISR or batteryISR
//which set the corresponding booleans
//If it was C, we display the battery status for 3 seconds and go on
//in either case, we display the compass heading, complete the loop, and wait for the next button press
//wait-for-interrupt has no effect unless the sleep bit is set in the
//System Control Register (SCR)(see setup, in the attachInterrupt area)
while (!(batteryRead || headingRead)) { //if an ISR has not set one of the booleans, wait (they're both initalized to false)
//if the sleep bit is set, we wait after this instruction for an interrupt
__WFI(); //Double underscore!! (took me a few looks to see that)
}
if (batteryRead) //if we got here because operator wants battery info (button C pressed--see batteryISR)
{
batteryRead=!batteryRead; //reset for next pass
float measuredvbat = analogRead(VBATPIN);
measuredvbat *= 2; // we divided by 2, so multiply back
measuredvbat *= 3.3; // Multiply by 3.3V, our reference voltage
measuredvbat /= 1024; // convert to voltage
display.clearDisplay();
display.setCursor(0,0);
display.setTextSize(2); //set size
display.print("VBat: " ); display.println(measuredvbat);
display.setTextSize(1); //reset size
display.print("Press Button ");display.setTextSize(2); display.println("B");
display.display();
display.setTextSize(1); //reset size
delay(3000); //hold for 3 sec, then go on and display heading
}
//however we got here (BUTTON_B or BUTTON_C), read the compass and display
/* Get a new sensor event */
headingRead = false; //set headingRead to false whether we need to or not
sensors_event_t event;
mag.getEvent(&event);
float heading = atan2(event.magnetic.y, event.magnetic.x);
heading+=declinationAngle; //add declination for location--initialized as a constant
// Correct for when signs are reversed.
if(heading < 0) heading += 2*PI;
// Check for wrap due to addition of declination.
if(heading > 2*PI) heading -= 2*PI;
// Convert radians to degrees for readability.
float headingDegrees = heading * 180/M_PI;
// use degrees to determine text Direction in map function
display.clearDisplay();
display.setCursor(0,0);
display.setTextSize(2); display.print(headingDegrees);display.print("="); display.println(mapDirection(headingDegrees));
display.setTextSize(1);display.print("Press Button ");display.setTextSize(2); display.print("B");
display.display();
display.setTextSize(1); //reset size
//end of loop--back to top to wait for interrupt (next button press)
}
2016-1011 VM
Code sample from Adafruit web site, FeatherWing OLED example
Combined with HMC5883L example as described below
Added power management, interrupts, and battery status display, plus a function
******************/
/***************************************************************************
This is a library example for the HMC5883 magnentometer/compass
Designed specifically to work with the Adafruit HMC5883 Breakout
http://www.adafruit.com/products/1746
*** You will also need to install the Adafruit_Sensor library! ***
These displays use I2C to communicate, 2 pins are required to interface.
Adafruit invests time and resources providing this open source code,
please support Adafruit andopen-source hardware by purchasing products
from Adafruit!
Written by Kevin Townsend for Adafruit Industries with some heading example from
Love Electronics (loveelectronics.co.uk)
This program is free software: you can redistribute it and/or modify
it under the terms of the version 3 GNU General Public License as
published by the Free Software Foundation.
This program is distributed in the hope that it will be useful,
but WITHOUT ANY WARRANTY; without even the implied warranty of
MERCHANTABILITY or FITNESS FOR A PARTICULAR PURPOSE. See the
GNU General Public License for more details.
You should have received a copy of the GNU General Public License
along with this program. If not, see
***************************************************************************/
#include
#include
#include
#include
#include
Adafruit_SSD1306 display = Adafruit_SSD1306();
#if defined(ESP8266)
#define BUTTON_A 0
#define BUTTON_B 16
#define BUTTON_C 2
#define LED 0
#elif defined(ARDUINO_STM32F2_FEATHER)
#define BUTTON_A PA15
#define BUTTON_B PC7
#define BUTTON_C PC5
#define LED PB5
#elif defined(TEENSYDUINO)
#define BUTTON_A 4
#define BUTTON_B 3
#define BUTTON_C 8
#define LED 13
#else
//these are the values for the Feather M0
#define BUTTON_A 9
#define BUTTON_B 6
#define BUTTON_C 5
#define LED 13
#endif
#define VBATPIN A7 //aka D9, which BUTTON_A uses on the M0--don't use BUTTON_A for interrupts if you are also trying to display battery status
#if (SSD1306_LCDHEIGHT != 32)
#error("Height incorrect, please fix Adafruit_SSD1306.h!");
#endif
/* Assign a unique ID to this sensor at the same time */
Adafruit_HMC5883_Unified mag = Adafruit_HMC5883_Unified(12345);
String directionArray[] = {"N","NNE","NE","ENE","E","ESE", "SE","SSE","S","SSW","SW","WSW","W","WNW","NW","NNW" }; //array for map function 16 compass directions
int Dir=0; //index for directionArray
const float declinationAngle = 0.261799; //angle for Orleans, MA
float heading = 0; //this and next for comparison to see if we've been interrupted
volatile boolean headingRead = false; //variables in ISR need to be volatile
volatile boolean batteryRead = false;
#if defined(ARDUINO_SAMD_ZERO) && defined(SERIAL_PORT_USBVIRTUAL)
// Required for Serial on Zero based boards
#define Serial SERIAL_PORT_USBVIRTUAL
#endif
void headingISR() //ISR for button B press
{
headingRead = true;
}
void batteryISR() //ISR for button A press
{
batteryRead = true;
}
String mapDirection (float headDeg)
{
//function to return direction in text based on heading in degrees
//N is 11.25 degrees each side of 0, so that doesn't work too well with the map function
//so if it's N, we say so
//this is a nice way of taking the procedural stuff out of line, so the loop code can just ask for the direction
if (headDeg > 348.75 | headDeg <11 .26="" 0="" around="" case="" direction="North," nbsp="" p="" special="" wrapped=""> {
Dir = 0;
} else {
//otherwise we elimiate the decimals and map degrees to text in 22.5 degree increments
Dir = map(headDeg*100,1126,34875,1,15);
}
//and return the selected text compass direction
return directionArray[Dir];
}
void setup() {
// by default, we'll generate the high voltage from the 3.3v line internally! (neat!)
display.begin(SSD1306_SWITCHCAPVCC, 0x3C); // initialize with the I2C addr 0x3C (for the 128x32)
// init done
// Show image buffer on the display hardware.
// Since the buffer is intialized with an Adafruit splashscreen
// internally, this will display the splashscreen.
display.display();
delay(1000);
pinMode(BUTTON_A, INPUT_PULLUP);
pinMode(BUTTON_B, INPUT_PULLUP);
pinMode(BUTTON_C, INPUT_PULLUP);
// Clear the buffer and display the press button message
display.clearDisplay();
display.setCursor(0,0);
display.print("Press Button ");display.setTextSize(2); display.print("B");
display.display();
display.setTextSize(1); //reset size
/* Initialise the sensor */
if(!mag.begin())
{
/* There was a problem detecting the HMC5883 ... check your connections */
display.println("Ooops, no HMC5883 detected ... Check your wiring!"); display.display();
while(1);
}
interrupts(); //enable interrupts (should not need to do this, but just for drill...)
//on the zero (as in Feather M0), interrup#=pin#; we use digitalPintToInterrupt here to provide some portability
//if we change to a different board AND that board allows interrups on the same pins, we don't have to change anything to get the interrupt number
//if we're using the battery function, VBATPIN is A7, also D9, and button A uses D9, so we avoid conflict
attachInterrupt(digitalPinToInterrupt(BUTTON_B), headingISR, LOW); // when button B is pressed display compass heading; use LOW because FALLING does not work in sleep mode--needs a timer
attachInterrupt(digitalPinToInterrupt(BUTTON_C), batteryISR, LOW); // when button C is pressed display battery status
//set System Control Register (SCR) sleep bit to deep sleep (do once so wfi (wait for intyerrupt) in loop waits)
//There are 2 sleep modes, idle and standby (deep) Sleep bit is SCR bit 2, 0 is idle, 1 is standby
// SCB->SCR |= 0b00000100; //just a test to see how to code binary--this works
// SCB->SCR |= SCB_SCR_SLEEPDEEP_Msk; // set to deep sleep (bit-1) by ORing with 100
SCB->SCR &= ~SCB_SCR_SLEEPDEEP_Msk; //set to idle (bit=0) by ANDing with the inverse of above--leaves all bita alone except sleep, which ANDs to 0
// SCB->SCR &= 0b11111011; //another test
//There are 3 idle modes, 0 (CPU),1 (CPU,AHB clock),2 (CPU,AHB,APB). Set this if using IDLE
PM->SLEEP.reg |= PM_SLEEP_IDLE_APB; //idle turn off CPU, AFB, APB //Advanced Peripheral Bus (APB) Advanced High-performance Bus (AHB)
// display instructions at startup
//set size and color of text, tell the user we're waiting 10s, then say to press the button
display.setTextSize(1); //parameter is scale of 5X8 pixels
display.setTextColor(WHITE); //options are BLACK | WHITE | INVERSE
display.clearDisplay();
display.setCursor(0,0);
display.println("initializing for 10s");
display.display();
// delay(10000); //see if sensor will settle down before taking reading
display.setCursor(0,0);
display.clearDisplay();
display.print("Press Button ");display.setTextSize(2); display.print("B"); //button letter is double size
display.display();
display.setTextSize(1); //reset size
}
void loop() {
//the wfi() means we only progress in loop on an interrupt, either button B or C pressed invoking headingISR or batteryISR
//which set the corresponding booleans
//If it was C, we display the battery status for 3 seconds and go on
//in either case, we display the compass heading, complete the loop, and wait for the next button press
//wait-for-interrupt has no effect unless the sleep bit is set in the
//System Control Register (SCR)(see setup, in the attachInterrupt area)
while (!(batteryRead || headingRead)) { //if an ISR has not set one of the booleans, wait (they're both initalized to false)
//if the sleep bit is set, we wait after this instruction for an interrupt
__WFI(); //Double underscore!! (took me a few looks to see that)
}
if (batteryRead) //if we got here because operator wants battery info (button C pressed--see batteryISR)
{
batteryRead=!batteryRead; //reset for next pass
float measuredvbat = analogRead(VBATPIN);
measuredvbat *= 2; // we divided by 2, so multiply back
measuredvbat *= 3.3; // Multiply by 3.3V, our reference voltage
measuredvbat /= 1024; // convert to voltage
display.clearDisplay();
display.setCursor(0,0);
display.setTextSize(2); //set size
display.print("VBat: " ); display.println(measuredvbat);
display.setTextSize(1); //reset size
display.print("Press Button ");display.setTextSize(2); display.println("B");
display.display();
display.setTextSize(1); //reset size
delay(3000); //hold for 3 sec, then go on and display heading
}
//however we got here (BUTTON_B or BUTTON_C), read the compass and display
/* Get a new sensor event */
headingRead = false; //set headingRead to false whether we need to or not
sensors_event_t event;
mag.getEvent(&event);
float heading = atan2(event.magnetic.y, event.magnetic.x);
heading+=declinationAngle; //add declination for location--initialized as a constant
// Correct for when signs are reversed.
if(heading < 0) heading += 2*PI;
// Check for wrap due to addition of declination.
if(heading > 2*PI) heading -= 2*PI;
// Convert radians to degrees for readability.
float headingDegrees = heading * 180/M_PI;
// use degrees to determine text Direction in map function
display.clearDisplay();
display.setCursor(0,0);
display.setTextSize(2); display.print(headingDegrees);display.print("="); display.println(mapDirection(headingDegrees));
display.setTextSize(1);display.print("Press Button ");display.setTextSize(2); display.print("B");
display.display();
display.setTextSize(1); //reset size
//end of loop--back to top to wait for interrupt (next button press)
}
Step 10 - next steps
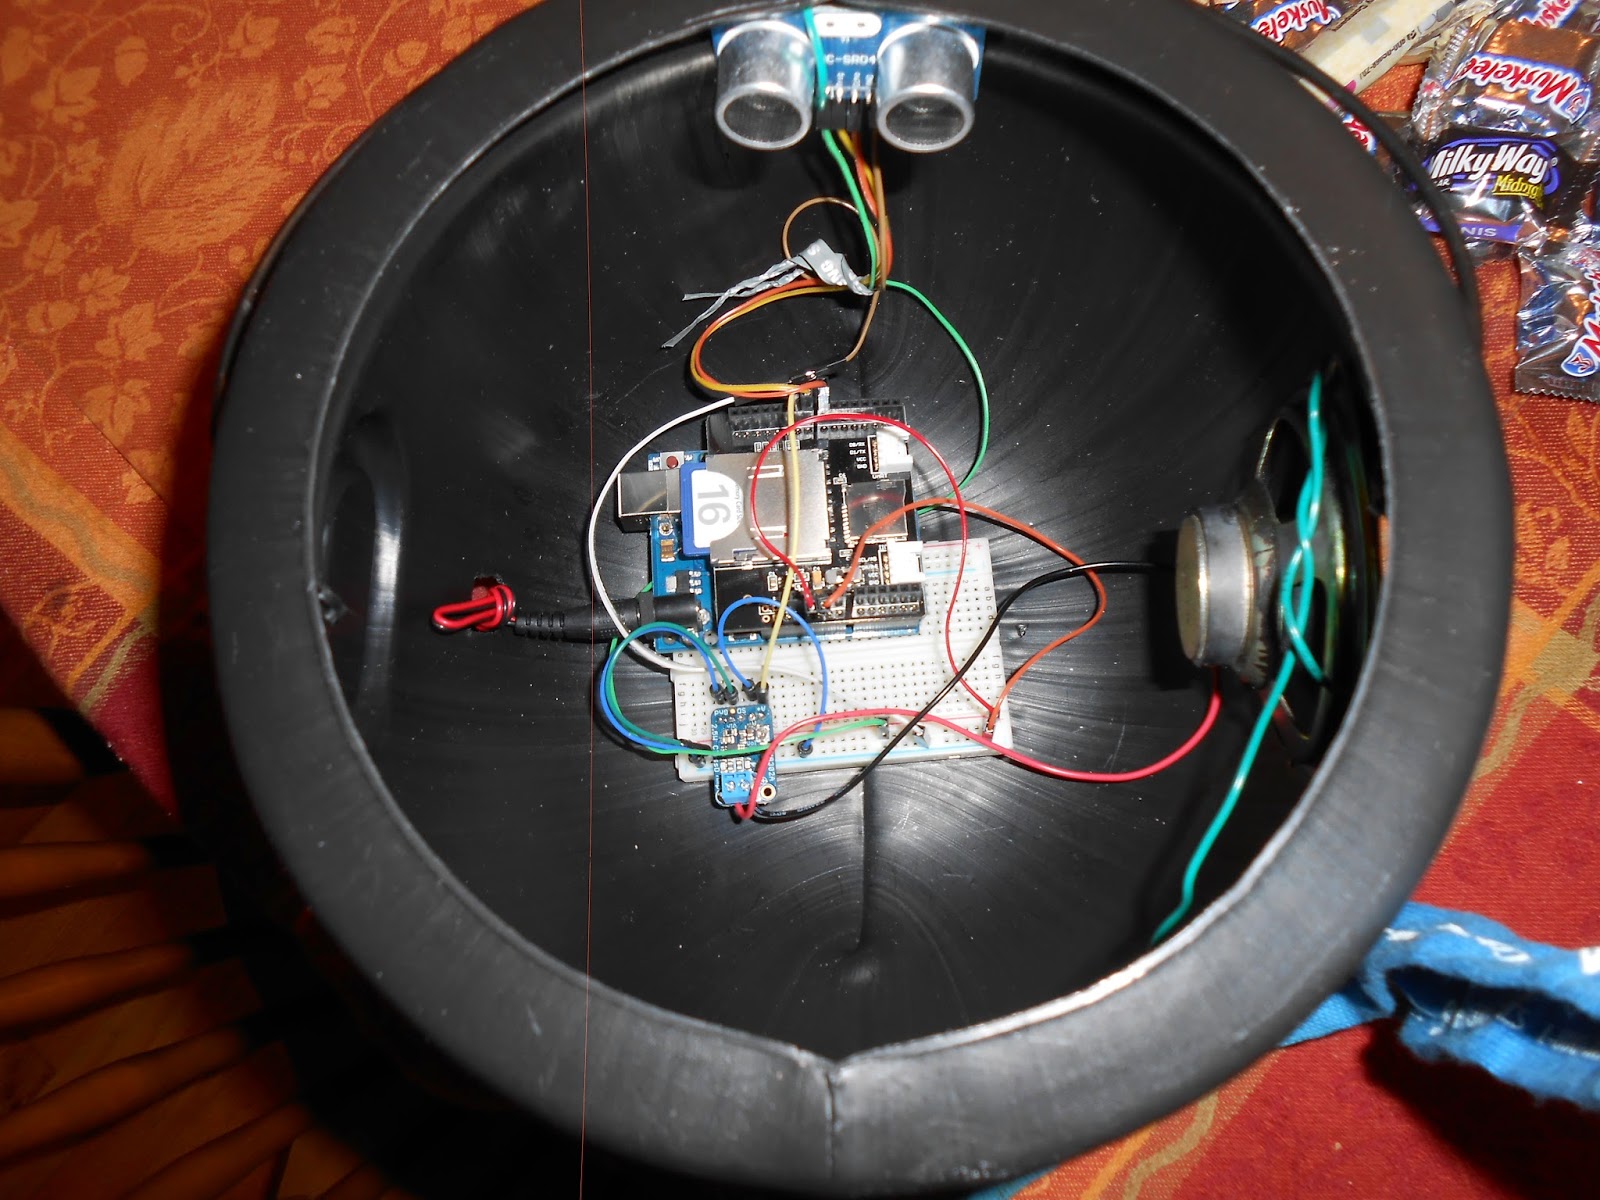
Now that it works on a breadboard the next step is to put it in an enclosure. I have a Radio Shack 3x2x1" box. I'll add a power LED, put the project on a perf board,make holes for the LED and the microUSB to reprogram and charge the battery, and make an opening for the display and buttons.
One problem is that the HMC588l is sensitive to magnetic and metal objects, including batteries. When I power it with a LiPo, the battery causes it to give erroneous headings. I need to work on that.
One problem is that the HMC588l is sensitive to magnetic and metal objects, including batteries. When I power it with a LiPo, the battery causes it to give erroneous headings. I need to work on that.